(Guest post by Alvin)
One of our biggest concerns about our Alaska northern lights trip was how to dress for the cold. As a native Californian, I had minimal experience with the extreme cold climate I was going to face in northern Alaska in March. The coldest temperatures I've encountered have been in New York and Tahoe, but obviously Alaska was another animal altogether, with temperatures expected to drop below 0°F in March. Despite the lack of first-hand experience, by doing some online research, I was able to successfully outfit myself for the trip.

Here is my final set of clothing, which kept me quite warm (including one night at -25°F or below standing on a frozen river, and another night at 0°F and at least -20°F wind chill). I feel that I could easily have handled even colder temperatures too. Many other things will work, and your needs may vary depending on individual temperature tolerances. But this could help get you started as far as ideas.
Fleece works great midlayer - relatively affordable, and maintains its insulating value even when compressed. Normally fleece isn't super wind-proof, but this doesn't matter for midlayer use. Wool would also work very well (however it tends to bemore expensive). You can also add other random sweaters or jackets you own as midlayers. I had a warm cotton sweater I put above my baselayer for some really cold nights (despite reading all the warnings about cotton, cotton things are still OK, so long as they're not touching your skin).
I ended up with two fleece jackets. For above zero temperatures I found I only needed one fleece jacket as a midlayer, but when it gets really cold, it's nice to have the option to stack both together.


I used a Mountain Hardware Fenite beanie (a nice wool cap that can go over my ears) and an old fleece balaclava (face mask) I bought a long time ago. I originally tried wearing a Turtle Fur the first few nights, which a very warm neck warmer, but I wear glasses and found that as I breathed out I kept fogging them up. So I ended up just using the balaclava and my wool beanie over that. The face mask does an excellent job and was hassle free.
Don't forget a good headlamp with a red LED mode (which preserves your night vision and is less intrusive to other people around you). I like the Petzl Tikka XP2 and Tikka Plus 2 lamps, since they keep a memory of the last lighting mode (red or white) you were in, unlike most of the Black Diamond models.
 If you are not trying to take photographs, this is easy. Something like glove liners inside of thick mitts should do the trick. I got the Black Diamond Mercury Mitts, which are surprisingly affordable. I would recommend mitts since they are much warmer than gloves.
However, if you are a photographer and trying to operate a camera in the cold, your hands are by far the most difficult problem. My original plan was to use lightweight glove liners to operate my camera, and put them in the mitts to warm them up. What actually ended up happening is I rarely used the mitts (as I was using the camera most of the time, and it was cumbersome to deal with the mitts). However my glove liners were really thin, and using them alone led to my hands freezing.
 Fortunately, I also brought some thicker gloves, called Glider Gloves (Winter Style). I switched to these for most of the nights, as they provided just enough insulation to keep my hands from freezing, but still allowed me to use my camera. When
not photographing, I put my hands in my jacket pocket. They were also just thin enough that I could stuff them in my Mercury mitts if needed.
Fortunately, I also brought some thicker gloves, called Glider Gloves (Winter Style). I switched to these for most of the nights, as they provided just enough insulation to keep my hands from freezing, but still allowed me to use my camera. When
not photographing, I put my hands in my jacket pocket. They were also just thin enough that I could stuff them in my Mercury mitts if needed.
This setup worked for the weather I experienced (and just barely). At more extreme cold like -40F or below you might need the mitts again. If you are a photographer, I would recommend that you find the warmest possible set of gloves or glove liners that still allows you to operate the camera.
As for boots, there are tons of options, and you will want to find ones that fit you without being overly tight. Baffin is a Canadian brand that seems to be very well-regarded. Finding boots was a challenge for me, since the local REI's didn't have a ton of options. Boots are something you want to try on, so using something like Zappos can be very useful.
In general, it seems like many people underestimate the importance of insulating their feet. On our Wiseman excursion, a lot of people complained of cold feet (no pun intended). If you're in Alaska during aurora season, chances are you will be standing on snow for long periods of time.
One of our biggest concerns about our Alaska northern lights trip was how to dress for the cold. As a native Californian, I had minimal experience with the extreme cold climate I was going to face in northern Alaska in March. The coldest temperatures I've encountered have been in New York and Tahoe, but obviously Alaska was another animal altogether, with temperatures expected to drop below 0°F in March. Despite the lack of first-hand experience, by doing some online research, I was able to successfully outfit myself for the trip.

Here is my final set of clothing, which kept me quite warm (including one night at -25°F or below standing on a frozen river, and another night at 0°F and at least -20°F wind chill). I feel that I could easily have handled even colder temperatures too. Many other things will work, and your needs may vary depending on individual temperature tolerances. But this could help get you started as far as ideas.
Upper baselayer
Your baselayer is an important layer. Merino wool is a great material, and despite not being very thick, has a surprising amount of insulation value.Smartwool Midweight Crew
- Highly recommended - this Smartwool is form fitting and extremely comfortable. I was able to wear the same one day after day. If you sweat it gets wicked away and dries out nicely.
- The "midweight" option is a perfect balance, providing a good amount of insulation and breathability.

Upper midlayer
Your midlayer(s) (which fit between the baselayer and your big down parka) provide additional insulation. Air trapped between layers also helps to trap warmth.Fleece works great midlayer - relatively affordable, and maintains its insulating value even when compressed. Normally fleece isn't super wind-proof, but this doesn't matter for midlayer use. Wool would also work very well (however it tends to bemore expensive). You can also add other random sweaters or jackets you own as midlayers. I had a warm cotton sweater I put above my baselayer for some really cold nights (despite reading all the warnings about cotton, cotton things are still OK, so long as they're not touching your skin).
I ended up with two fleece jackets. For above zero temperatures I found I only needed one fleece jacket as a midlayer, but when it gets really cold, it's nice to have the option to stack both together.
Patagonia R3 Hi-Loft Fleece Jacket
- I really like this jacket, although it is pricey. It's a nice mid-weight fleece. I use it a lot as an everyday jacket. I actually originally bought the Mountain Hardware Monkey Man, which is noticeably warmer - but I found it had an odd fit and the armpit area bunches up.
Mountain Hardware Dual Fleece Jacket
- This is another nice fleece jacket. I wanted something a bit warmer than the R3, just in case. (The only flaw is that the collar is poorly designed and doesn't stay down.)
Upper insulation/outer layer
This is your most important piece, and provides the majority of your insulation, and not to mention wind-protection. Don't skimp on this!
 |
Mountain Hardwear Chillwave Down Parka
- Fantastic and reasonably-priced 650 fill down jacket. More than enough for insulating, and also protected me from the strong winds on Twelve Mile summit. You could theoretically get warmer and pricier jackets (I saw a lot of Canada Goose parkas up in Coldfoot, AK), but the Chillwave worked out great.
- Another one I considered was the Eddie Bauer First Ascent Peak XV, which is probably warmer at 800 fill, but it was more expensive.
Lower baselayer
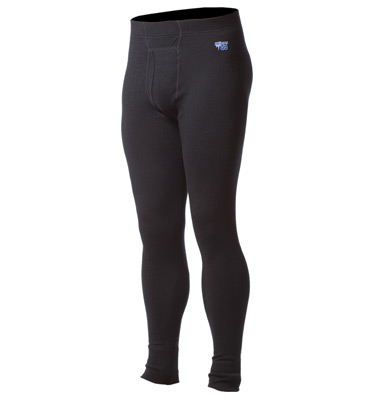
Minus33 Expedition Weight Merino Wool Bottoms
- I chose to go with heavyweight because with your leg layers, unlike your upper layers, you can't easily just add another layer, so I figured I'd make each layer as warm as possible. Smartwool didn't seem to have a heavy/expedition weight layer so I went with Minus33. As a brand Minus33 is cheaper, but still great quality.
Lower midlayer
Cabela's 200-weight Polartec Fleece Pants
- As far as fleece pants, you could go with any brand, but by January it was very hard to find 200-weight fleece pants sold anywhere, except for this Cabela's brand. You can also try something synthetic (MH Compressor) or down-filled pants, but fleece is very cheap and extremely warm.

Lower outer layer
North Face Freedom Insulated Pants
- Very functional waterproof pants - I got these because they came in different inseam options. I use these as my new snowboarding pants as well. In general, ski pants or bibs that have some amount of light insulation will work. Obviously as this is your outer layer, it needs to be waterproof and protect you from snow and wind.
Head
Keeping your head warm is critical, but fortunately it isn't difficult. You will want some sort of warm wool or fleece hat, and either a neck warmer, face mask, or something else similar to cover up the rest of your face. It is critical to cover up as much exposed skin on your head as possible, especially your ear, or you will not be able to last very long outside.I used a Mountain Hardware Fenite beanie (a nice wool cap that can go over my ears) and an old fleece balaclava (face mask) I bought a long time ago. I originally tried wearing a Turtle Fur the first few nights, which a very warm neck warmer, but I wear glasses and found that as I breathed out I kept fogging them up. So I ended up just using the balaclava and my wool beanie over that. The face mask does an excellent job and was hassle free.
Don't forget a good headlamp with a red LED mode (which preserves your night vision and is less intrusive to other people around you). I like the Petzl Tikka XP2 and Tikka Plus 2 lamps, since they keep a memory of the last lighting mode (red or white) you were in, unlike most of the Black Diamond models.
Hands
 If you are not trying to take photographs, this is easy. Something like glove liners inside of thick mitts should do the trick. I got the Black Diamond Mercury Mitts, which are surprisingly affordable. I would recommend mitts since they are much warmer than gloves.
However, if you are a photographer and trying to operate a camera in the cold, your hands are by far the most difficult problem. My original plan was to use lightweight glove liners to operate my camera, and put them in the mitts to warm them up. What actually ended up happening is I rarely used the mitts (as I was using the camera most of the time, and it was cumbersome to deal with the mitts). However my glove liners were really thin, and using them alone led to my hands freezing.
This setup worked for the weather I experienced (and just barely). At more extreme cold like -40F or below you might need the mitts again. If you are a photographer, I would recommend that you find the warmest possible set of gloves or glove liners that still allows you to operate the camera.
Feet
I used REI Merino Wool Liner Socks and Smartwool Expedition Trekking Socks. The sock liners do seem to do some sweat management, and they make it more comfortable than just wearing the heavy wool socks on their own. It also means you only really need one or two pairs of the heavy wool socks (since you can swap out your liners when they become dirty).As for boots, there are tons of options, and you will want to find ones that fit you without being overly tight. Baffin is a Canadian brand that seems to be very well-regarded. Finding boots was a challenge for me, since the local REI's didn't have a ton of options. Boots are something you want to try on, so using something like Zappos can be very useful.
In general, it seems like many people underestimate the importance of insulating their feet. On our Wiseman excursion, a lot of people complained of cold feet (no pun intended). If you're in Alaska during aurora season, chances are you will be standing on snow for long periods of time.
Baffin Impact Boots
- Ridiculously large (you cannot drive in these), but kept my feet very warm (probably the warmest part of my body). Probably a bit overkill, as they are supposedly rated to -148°F.
- In Wiseman, I was able to stand on top of a frozen river for hours with no problem using these boots.
- I chose these mostly because of fit (I have wide feet and tried a lot of other Baffin models, and this fit the best).

Things I learned
- You will only feel as warm as your weakest point. If everything else is warm but you're not wearing enough to insulate your head or your feet, your body will just feel cold. Period.
- Even in the extreme cold, you can actually overheat if you start doing any moderate hiking or activity.
Great post. To carry winter wear is very important when you visit Alaska. This is very helpful post for me. I will definitely take care of these things during my Northern lights trip.
ReplyDeleteAlaska northern lights tours