Showing posts with label northern lights. Show all posts

Thursday, July 31, 2014

Tromsø, Norway | Hunting Northern Lights

Ringvassøya

Many sources claim Tromsø, Norway to be one of the best places on earth to watch northern lights. However, when we visited Tromsø in late March/early April this year, I couldn't help but feel somewhat tricked. Tromsø may have some of the most amazing scenery for photographing northern lights, and it may be directly under the auroral oval, but weather conditions around Tromsø can make the possibility of seeing northern lights almost a lost cause on any given night. Tromsø is on the coast of Norway, which can often be covered in clouds any time of day/year. Somehow, we didn't realize this while researching Tromsø (big mistake on our part). Of the five nights we were there, we successfully saw auroras on only two nights. So be warned - don't go to Tromsø expecting to see northern lights without significant effort, and be prepared to drive long distances to find clear weather. This means long nights with little sleep (but please, sleep during the day for your own sanity).

You can go aurora hunting either by renting a car and driving yourself, or you can go with an organized tour. On our first night, we went with a tour (Arctic Explorers, who was great) so we could learn tips from our guide in terms of where to go and to prepare us for subsequent nights on our own. On the night of the tour, it was snowing heavily in Tromsø, but luckily, our guide said there'd be clear skies in Skogsfjord (on Ringvassøya), a 2+ hour drive from Tromsø. He drove us through the blizzard, and when we arrived, lo and behold, there was perfectly clear sky. There was a fantastic spurt of aurora activity as soon as we arrived and we watched lovely bands of light dancing over the fjords for hours.

Skogsfjord, Ringvassøya


How to find clear skies

For the subsequent nights, we drove out on our own, and finding clear skies was painstaking. Here are some DIY tips to increase your chances of finding clear skies from our experience:
  1. On the afternoon of your aurora hunt, check Norway's most reliable weather forecast: yr.no.
  2. Expand the map to full-screen to view the clouds & precipitation forecast. 
  3. Zoom in to the Tromsø region (or whichever town you are near). 
  4. Move the hour toggle to the evening hours (~9pm and after) and see which region/town has the LEAST clouds, and make note of which hour(s) the sky is clearest there. 
  5. If Tromsø is forecasted to be clear, that's perfect -- no need to drive very far. You can just go to a fjord nearby, or somewhere away from city lights, and the sky will hopefully be clear. Note: Locals advised us to drive inland towards Finland (east of Lyngen Alps) for better weather if Tromsø is cloudy. We tried this one night but the weather was still bad.
  6. After you determine the location with clear skies you want to go to, cross reference that location by typing in the name of the town in yr.no to check if it is indeed clear during those hours using the hour-by-hour forecast. Refer to a detailed map (can be picked up from the Tromsø tourist office) to find the name of a specific town (Google maps isn't very thorough for small Norwegian towns). 
  7. Plan to drive in the direction of that clearest location and plan to arrive earlier before the clearest hour. This is so you have time to prepare your camera if you plan to take photos.
  8. As you drive towards your location, look outside often to see how the sky is progressing. If you begin to see more clear sky, think about if you prefer to stop soon, or if you want to continue driving. 
Sometimes this can be a gamble, because weather forecasts aren't always accurate. If you drive through a patch of clear sky but have not yet arrived at your "final" destination, it may be wise to just stop there because there may be no guarantee that the sky will still be clear further on. This is why I advise to just drive in the direction towards your destination, because you may decide not to actually arrive at that destination if you find clear sky before then.

This is exactly what happened on our last night in Tromsø. Before we started our aurora hunt that evening, we saw on yr.no that there would be clear skies on the west side of Ringvassøya. But on the way there, we found a clear patch of sky with a nice fjord backdrop and decided to stop. Thankfully we did, because shortly after, an amazing aurora display began and lasted several hours. We were even able to make a timelapse and real-time video of the activity that night:


More tips

  • Be patient and persistent. Just because you find clear skies doesn't mean there will be auroras. Try again the next night. Time is your most valuable asset -- the more nights you try, the higher your chances of seeing auroras.
  • Bring food and snacks to prepare for potential long drives.
  • No need to rent a 4 x 4 in Norway -- all rental cars are required to have studded tires, which should suffice for driving in snow. 
  • Dress warmly!
  • Although Norway is more scenic, if your goal is mainly to see northern lights I think Alaska is the better place to do that, especially in March when the weather is driest!

Friday, April 26, 2013

Northern lights in Alaska: What to wear

(Guest post by Alvin)

One of our biggest concerns about our Alaska northern lights trip was how to dress for the cold. As a native Californian, I had minimal experience with the extreme cold climate I was going to face in northern Alaska in March. The coldest temperatures I've encountered have been in New York and Tahoe, but obviously Alaska was another animal altogether, with temperatures expected to drop below 0°F in March. Despite the lack of first-hand experience, by doing some online research, I was able to successfully outfit myself for the trip.


Here is my final set of clothing, which kept me quite warm (including one night at -25°F or below standing on a frozen river, and another night at 0°F and at least -20°F wind chill). I feel that I could easily have handled even colder temperatures too. Many other things will work, and your needs may vary depending on individual temperature tolerances. But this could help get you started as far as ideas.


Upper baselayer 

Your baselayer is an important layer. Merino wool is a great material, and despite not being very thick, has a surprising amount of insulation value.


Smartwool Midweight Crew 

  • Highly recommended - this Smartwool is form fitting and extremely comfortable. I was able to wear the same one day after day. If you sweat it gets wicked away and dries out nicely.
  • The "midweight" option is a perfect balance, providing a good amount of insulation and breathability.


Upper midlayer

Your midlayer(s) (which fit between the baselayer and your big down parka) provide additional insulation. Air trapped between layers also helps to trap warmth.

Fleece works great midlayer - relatively affordable, and maintains its insulating value even when compressed. Normally fleece isn't super wind-proof, but this doesn't matter for midlayer use. Wool would also work very well (however it tends to bemore expensive). You can also add other random sweaters or jackets you own as midlayers. I had a warm cotton sweater I put above my baselayer for some really cold nights (despite reading all the warnings about cotton, cotton things are still OK, so long as they're not touching your skin).

I ended up with two fleece jackets. For above zero temperatures I found I only needed one fleece jacket as a midlayer, but when it gets really cold, it's nice to have the option to stack both together.


Patagonia R3 Hi-Loft Fleece Jacket

  • I really like this jacket, although it is pricey. It's a nice mid-weight fleece. I use it a lot as an everyday jacket. I actually originally bought the Mountain Hardware Monkey Man, which is noticeably warmer - but I found it had an odd fit and the armpit area bunches up.

 Mountain Hardware Dual Fleece Jacket

  • This is another nice fleece jacket. I wanted something a bit warmer than the R3, just in case. (The only flaw is that the collar is poorly designed and doesn't stay down.)


Upper insulation/outer layer

This is your most important piece, and provides the majority of your insulation, and not to mention wind-protection. Don't skimp on this!


Mountain Hardwear Chillwave Down Parka

  • Fantastic and reasonably-priced 650 fill down jacket. More than enough for insulating, and also protected me from the strong winds on Twelve Mile summit. You could theoretically get warmer and pricier jackets (I saw a lot of Canada Goose parkas up in Coldfoot, AK), but the Chillwave worked out great. 
  • Another one I considered was the Eddie Bauer First Ascent Peak XV, which is probably warmer at 800 fill, but it was more expensive.


Lower baselayer

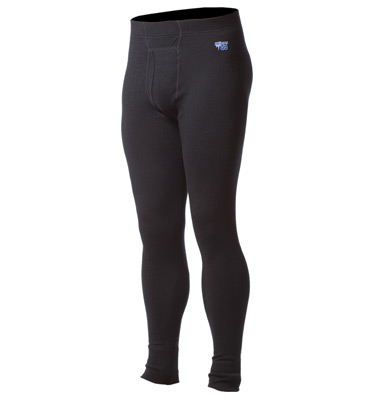
Minus33 Expedition Weight Merino Wool Bottoms

  • I chose to go with heavyweight because with your leg layers, unlike your upper layers, you can't easily just add another layer, so I figured I'd make each layer as warm as possible. Smartwool didn't seem to have a heavy/expedition weight layer so I went with Minus33. As a brand Minus33 is cheaper, but still great quality.


Lower midlayer

Cabela's 200-weight Polartec Fleece Pants

  • As far as fleece pants, you could go with any brand, but by January it was very hard to find 200-weight fleece pants sold anywhere, except for this Cabela's brand. You can also try something synthetic (MH Compressor) or down-filled pants, but fleece is very cheap and extremely warm.

Lower outer layer

North Face Freedom Insulated Pants

  • Very functional waterproof pants - I got these because they came in different inseam options. I use these as my new snowboarding pants as well. In general, ski pants or bibs that have some amount of light insulation will work. Obviously as this is your outer layer, it needs to be waterproof and protect you from snow and wind.


Head

Keeping your head warm is critical, but fortunately it isn't difficult. You will want some sort of warm wool or fleece hat, and either a neck warmer, face mask, or something else similar to cover up the rest of your face. It is critical to cover up as much exposed skin on your head as possible, especially your ear, or you will not be able to last very long outside.

I used a Mountain Hardware Fenite beanie (a nice wool cap that can go over my ears) and an old fleece balaclava (face mask) I bought a long time ago. I originally tried wearing a Turtle Fur the first few nights, which a very warm neck warmer, but I wear glasses and found that as I breathed out I kept fogging them up. So I ended up just using the balaclava and my wool beanie over that. The face mask does an excellent job and was hassle free.

Don't forget a good headlamp with a red LED mode (which preserves your night vision and is less intrusive to other people around you). I like the Petzl Tikka XP2 and Tikka Plus 2 lamps, since they keep a memory of the last lighting mode (red or white) you were in, unlike most of the Black Diamond models.


Hands


If you are not trying to take photographs, this is easy. Something like glove liners inside of thick mitts should do the trick. I got the Black Diamond Mercury Mitts, which are surprisingly affordable. I would recommend mitts since they are much warmer than gloves.

However, if you are a photographer and trying to operate a camera in the cold, your hands are by far the most difficult problem. My original plan was to use lightweight glove liners to operate my camera, and put them in the mitts to warm them up. What actually ended up happening is I rarely used the mitts (as I was using the camera most of the time, and it was cumbersome to deal with the mitts). However my glove liners were really thin, and using them alone led to my hands freezing.


Fortunately, I also brought some thicker gloves, called Glider Gloves (Winter Style). I switched to these for most of the nights, as they provided just enough insulation to keep my hands from freezing, but still allowed me to use my camera. When not photographing, I put my hands in my jacket pocket. They were also just thin enough that I could stuff them in my Mercury mitts if needed.

This setup worked for the weather I experienced (and just barely). At more extreme cold like -40F or below you might need the mitts again. If you are a photographer, I would recommend that you find the warmest possible set of gloves or glove liners that still allows you to operate the camera.


Feet

I used REI Merino Wool Liner Socks and Smartwool Expedition Trekking Socks. The sock liners do seem to do some sweat management, and they make it more comfortable than just wearing the heavy wool socks on their own. It also means you only really need one or two pairs of the heavy wool socks (since you can swap out your liners when they become dirty).

As for boots, there are tons of options, and you will want to find ones that fit you without being overly tight. Baffin is a Canadian brand that seems to be very well-regarded. Finding boots was a challenge for me, since the local REI's didn't have a ton of options. Boots are something you want to try on, so using something like Zappos can be very useful.

In general, it seems like many people underestimate the importance of insulating their feet. On our Wiseman excursion, a lot of people complained of cold feet (no pun intended). If you're in Alaska during aurora season, chances are you will be standing on snow for long periods of time.


Baffin Impact Boots

  • Ridiculously large (you cannot drive in these), but kept my feet very warm (probably the warmest part of my body). Probably a bit overkill, as they are supposedly rated to -148°F.
  • In Wiseman, I was able to stand on top of a frozen river for hours with no problem using these boots.
  • I chose these mostly because of fit (I have wide feet and tried a lot of other Baffin models, and this fit the best). 


Things I learned

  • You will only feel as warm as your weakest point. If everything else is warm but you're not wearing enough to insulate your head or your feet, your body will just feel cold. Period.
  • Even in the extreme cold, you can actually overheat if you start doing any moderate hiking or activity. 

Related posts

Saturday, April 6, 2013

Northern lights in Alaska

​Like most people, seeing the northern lights was always on my bucket list. Seeing photos of them on the internet always blew my mind that such a beautiful natural phenomenon could even exist. I had the chance to visit Alaska (Fairbanks and Coldfoot) last month in March during the week of the new moon to witness this amazing spectacle firsthand. There are very few things in the world as mesmerizing as watching the elusive aurora borealis dancing and swirling above your head.

​Our trip ​to Alaska was definitely one of our most challenging trips. Not only was it outrageously cold (the lowest we encountered was -25°F), but it was also very tiring in that we needed to stay up every night until 2-3AM to wait for auroras. The movement (dancing) of auroras can vary, and spurts of activity can last anywhere from just a few minutes to hours. Since my fiancé is a photographer, he had to be ready to capture the auroras whenever and wherever it showed up in the night sky. Prior to our trip, we also had to purchase an entire set of winter clothing that could handle waiting around outside for hours in subzero temperatures. There was also a lot of research that needed to be done for the best viewing spots.

Twelve Mile Summit on Steese Highway near Fairbanks, AK. 

​The timing of our trip was also tricky. In short, northern (and southern) lights are caused ​by solar activity and magnetic particles shot out by our sun that hits Earth's magnetic field. Our sun goes through 11-year cycles from very little activity (solar minimum) to high activity (solar maximum). NASA predicted that 2013 would be the year of solar maximum, but that doesn't guarantee you will see a good show on any given night. There still could be weeks with little solar activity and the weather also needs to cooperate. The sun could also produce flares that are not aimed at Earth! I booked our flights six months before our trip and crossed my fingers that somehow it would all work out. Thankfully, we were extremely lucky that during our week there, the sun gave off two Earth-directed explosions that created some of the most stunning aurora displays of the season.


Wiseman, AK. We did a 3-day tour with Northern Alaska Tour Company to Coldfoot, past the Arctic Circle. Each night we went on an excursion to see the auroras in Wiseman. This photo was taken the first night when there was a huge spurt of activity that lasted about 3 minutes. Albeit short-lived, those 3 minutes I will remember for the rest of my life. People were squealing with joy as the fireworks-like display danced above us.

Twelve Mile Summit on Steese Highway near Fairbanks, AK. I named this one "MEGA SWIRL" :)

Two days before our trip ended, we read on Spaceweather.com that the sun produced a massive solar flare whose particles would reach Earth in about 2 days that could potentially result in a geomagnetic storm. We were stoked and anxiously awaited the arrival of the storm, though we were unsure whether or not we would be able to catch it in time. Just two hours before our flight home that departed at 1:00AM on March 17th, we patiently waited on Ester Dome. Luckily, out of nowhere around 11:00PM, the sky started filling up with auroras with the most movement we had seen that week. The twirling and the dancing lasted nearly the entire hour, right before we needed to head to the airport. 

Ester Dome in Fairbanks, AK

We later realized we made the most idiotic mistake of deciding to NOT miss our flight home, because we learned that the auroras became even better later that night and seeing auroras at that intensity is a rare event. D'oh!! But I'm still very thankful that the stars were aligned (quite literally) for us to catch this epic display, which we later learned from other aurora hunters that it was the best display they had seen in years!

Ester Dome in Fairbanks, AK

Tips

  • Spaceweather.com and 3D Sun are great for monitoring solar activity
  • Time is your most valuable asset for aurora viewing. The longer you wait and the more nights you try, the higher the chances you will see good shows.
  • What to wear